Setting the file. One moment.
Verify error tracking
Recommended
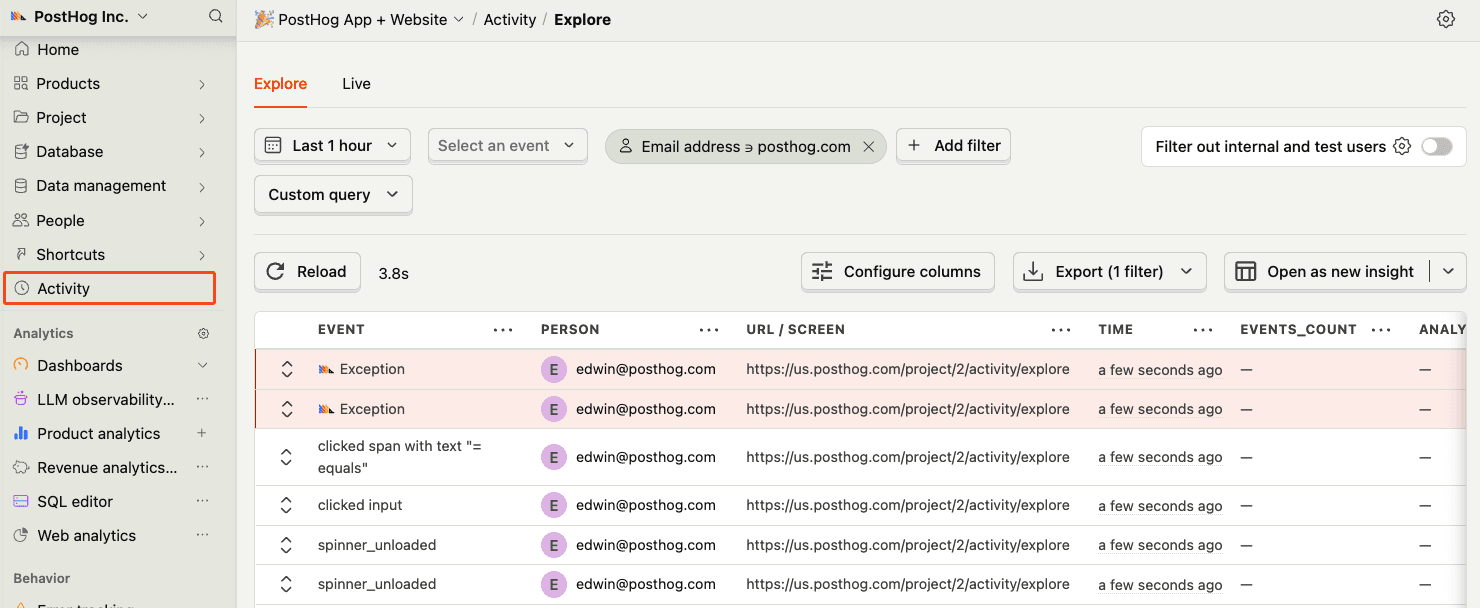
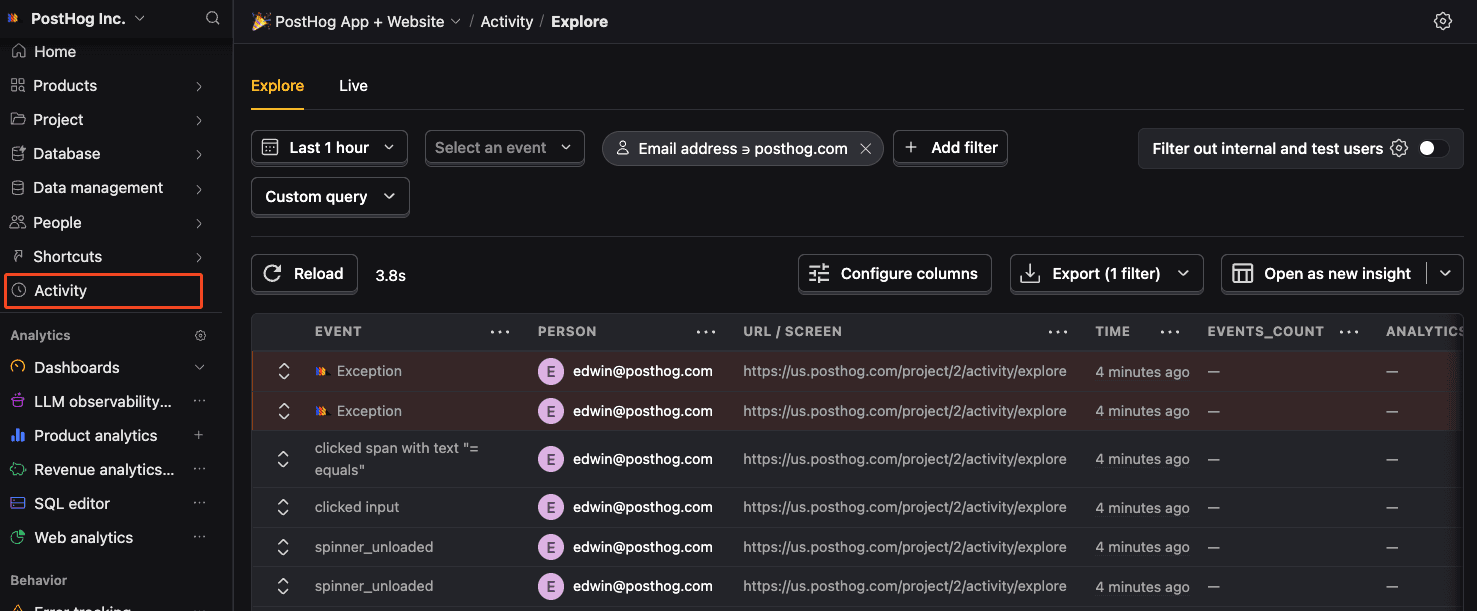
Confirm events are being sent to PostHog
Before proceeding, let’s make sure exception events are being captured and sent to PostHog. You should see events appear in the activity feed.
Chapter 158 · Omnibus Instrument Error Tracking
Subchapter 158.10
references/nextjs.mdMarkdown13 KBView on GitHub
Required
Install the PostHog JavaScript library using your package manager:
PostHog AI
npm install posthog-jsyarn add posthog-jspnpm add posthog-js2
Required
Add your PostHog project token and host to your .env.local file and to your hosting provider (e.g. Vercel, Netlify). These values need to start with NEXT_PUBLIC_ to be accessible on the client-side.
.env.local
PostHog AI
NEXT_PUBLIC_POSTHOG_PROJECT_TOKEN=<ph_project_token>
NEXT_PUBLIC_POSTHOG_HOST=https://us.i.posthog.com
3
Required
Choose the integration method based on your Next.js version and router type.
If you’re using Next.js 15.3+, you can use instrumentation-client.ts for a lightweight, fast integration:
instrumentation-client.ts
PostHog AI
import posthog from 'posthog-js'
posthog.init(process.env.NEXT_PUBLIC_POSTHOG_PROJECT_TOKEN!, {
    api_host: process.env.NEXT_PUBLIC_POSTHOG_HOST,
    defaults: '2026-01-30'
})For the App router, create a providers.tsx file in your app folder. The posthog-js library needs to be initialized on the client-side using the 'use client' directive:
app/providers.tsx
PostHog AI
'use client'
import { usePathname, useSearchParams } from "next/navigation"
import { useEffect } from "react"
import posthog from 'posthog-js'
import { PostHogProvider as PHProvider } from 'posthog-js/react'
export function PostHogProvider({ children }: { children: React
Then import the PostHogProvider component in your app/layout.tsx and wrap your app with it:
app/layout.tsx
PostHog AI
import './globals.css'
import { PostHogProvider } from './providers'
export default function RootLayout({ children }: { children: React.ReactNode }) {
  return (
    <html lang="en">
      <body>
        <PostHogProvider>
          {children}
For the Pages router, integrate PostHog at the root of your app in pages/_app.tsx:
pages/_app.tsx
PostHog AI
import { useEffect } from 'react'
import { Router } from 'next/router'
import posthog from 'posthog-js'
import { PostHogProvider } from 'posthog-js/react'
import type { AppProps } from 'next/app'
export default function App({ Component, pageProps }: AppProps)
Defaults option
The defaults option automatically configures PostHog with recommended settings for new projects. See SDK defaults (opens in a new tab) for details.
4
Recommended
Once initialized in instrumentation-client.ts, import posthog from posthog-js anywhere and call the methods you need:
app/checkout/page.tsx
PostHog AI
'use client'
import posthog from 'posthog-js'
export default function CheckoutPage() {
    function handlePurchase() {
        posthog.capture('purchase_completed', { amount: 99 })
    }
    return <button onClick={handlePurchase}>Complete purchase</button>
}Use the usePostHog hook to access PostHog in client components:
app/checkout/page.tsx
PostHog AI
'use client'
import { usePostHog } from 'posthog-js/react'
export default function CheckoutPage() {
    const posthog = usePostHog()
    function handlePurchase() {
        posthog.capture('purchase_completed', { amount: 99 })
    }
    return <button onClick={handlePurchase
5
Required
PostHog can automatically capture unhandled exceptions in your Next.js app using the JavaScript Web SDK.
You can enable exception autocapture for the JavaScript Web SDK in the Error tracking section of your project settings (opens in a new tab).
It is also possible to manually capture exceptions using the captureException method:
JavaScript
PostHog AI
posthog.captureException(error, additionalProperties)Manual capture is very useful if you already use error boundaries to handle errors in your app:
Next.js uses error boundaries (opens in a new tab) to handle uncaught exceptions by rendering a fallback UI instead of the crashing components. To set one up, create a error.tsx file in any of your route directories. This triggers when there is an error rendering your component and should look like this:
error.tsx
PostHog AI
"use client"
import posthog from "posthog-js"
import { useEffect } from "react"
export default function Error({
  error,
  reset,
}: {
  error: Error & { digest?: string }
  reset: () => void
})
You can also create a Global Error component (opens in a new tab) in your root layout to capture unhandled exceptions in your root layout.
app/global-error.tsx
PostHog AI
'use client'
import posthog from "posthog-js"
import NextError from "next/error"
import { useEffect } from "react"
export default function GlobalError({
  error,
  reset,
}: {
  error: Error & { digest?: string
For Pages Router, you can use React’s Error Boundaries (opens in a new tab) to catch JavaScript errors anywhere in the component tree. Create a custom error boundary component and report errors to PostHog in the componentDidCatch method:
components/ErrorBoundary.tsx
PostHog AI
componentDidCatch(error, errorInfo) {
  posthog.captureException(error)
}
Then wrap your app or specific components with the error boundary:
pages/_app.tsx
PostHog AI
import type { AppProps } from 'next/app'
import ErrorBoundary from '../components/ErrorBoundary'
export default function App({ Component, pageProps }: AppProps) {
  return (
    <ErrorBoundary>
      <Component {...pageProps} />
    </ErrorBoundary>
  )
}
6
Required
Next.js enables you to both server-side render pages and add server-side functionality. To integrate PostHog into your Next.js app on the server-side, you can use the Node SDK (opens in a new tab).
First, install the posthog-node library:
PostHog AI
npm install posthog-node --saveyarn add posthog-nodepnpm add posthog-nodebun add posthog-nodeFor the backend, we can create a lib/posthog-server.js file. In it, initialize PostHog from posthog-node as a singleton with your project token and host from your project settings (opens in a new tab).
This looks like this:
lib/posthog-server.js
PostHog AI
import { PostHog } from 'posthog-node'
let posthogInstance = null
export function getPostHogServer() {
  if (!posthogInstance) {
    posthogInstance = new PostHog(
      process.env.NEXT_PUBLIC_POSTHOG_PROJECT_TOKEN,
      {
        host: process.env.NEXT_PUBLIC_POSTHOG_HOST,
        flushAt: 1,
You can now use the getPostHogServer function to capture exceptions in server-side code.
JavaScript
PostHog AI
const posthog = getPostHogServer()
try {
    throw new Error("This is a test exception for error tracking")
} catch (error) {
    posthog.captureException(error, {
        source: 'test',
        user_id: 'test-user-123',
    })
}Recommended
You should also see events and exceptions in PostHog coming from your server-side code in the activity feed.
7
Required
To capture errors that occur in your server-side code, you can set up an instrumentation.ts (opens in a new tab) file at the root of your project. This provides a onRequestError hook that you can use to capture errors.
Importantly, you need to:
posthog-node client in your server-side code. See our doc on setting up Next.js server-side analytics (opens in a new tab) for more.nodejs runtime to ensure PostHog works. You can call posthog.debug() to get verbose logging.distinct_id from the cookie to connect the error to a specific user.This looks like this:
JavaScript
PostHog AI
// instrumentation.js
export function register() {
  // No-op for initialization
}
export const onRequestError = async (err, request, context) => {
  if (process.env.NEXT_RUNTIME
You can find a full example of both this and client-side error tracking in our Next.js error monitoring tutorial (opens in a new tab).
Recommended
Confirm events are being sent to PostHog
Before proceeding, let’s make sure exception events are being captured and sent to PostHog. You should see events appear in the activity feed.
8
Required
Great, you’re capturing exceptions! If you serve minified bundles, the next step is to upload source maps to generate accurate stack traces.
Let’s continue to the next section.
Ask a question
HelpfulCould be better