Chapter 150 · LLM Analytics Setup
Subchapter 150.20
references/llamaindex.mdMarkdown5 KBView on GitHub
Required
Setting up analytics starts with installing the PostHog SDK. The LlamaIndex integration uses PostHog’s OpenAI wrapper.
pip install posthog2
Required
Install LlamaIndex with the OpenAI integration. PostHog instruments your LLM calls by wrapping the OpenAI client that LlamaIndex uses.
pip install llama-index llama-index-llms-openai3
Required
Initialize PostHog with your project token and host from your project settings (opens in a new tab), then create a PostHog OpenAI wrapper and pass it to LlamaIndex’s OpenAI LLM class.
from llama_index.llms.openai import OpenAI as LlamaOpenAI
from posthog.ai.openai import OpenAI
from posthog import Posthog
posthog = Posthog(
"<ph_project_token>",
host="https://us.i.posthog.com"
)
openai_client = OpenAI(
api_key="your_openai_api_key",
posthog_client=posthog
)
llm = LlamaOpenAI(
model="gpt-5-mini",
api_key="your_openai_api_key",
)
llm._client = openai_clientHow this works
PostHog’s OpenAI wrapper is a proper subclass of openai.OpenAI, so it can replace the internal client used by LlamaIndex’s OpenAI LLM. PostHog captures $ai_generation events automatically without proxying your calls. Note: This approach accesses an internal attribute (_client) which may change in future LlamaIndex versions. Check for updates if you encounter issues after upgrading LlamaIndex.
4
Required
Use LlamaIndex as normal. PostHog automatically captures an $ai_generation event for each LLM call made through the wrapped client.
from llama_index.core import VectorStoreIndex, SimpleDirectoryReader
# Load your documents
documents = SimpleDirectoryReader("data").load_data()
# Create an index
index = VectorStoreIndex.from_documents(documents, llm=llm)
# Query the index
query_engine = index.as_query_engine(llm=llm)
response = query_engine.query("What is this document about?")
print(response)You can expect captured $ai_generation events to have the following properties:
| Property | Description |
|---|---|
| $ai_model | The specific model, like gpt-5-mini or claude-4-sonnet |
| $ai_latency | The latency of the LLM call in seconds |
| $ai_time_to_first_token | Time to first token in seconds (streaming only) |
| $ai_tools | Tools and functions available to the LLM |
| $ai_input | List of messages sent to the LLM |
| $ai_input_tokens | The number of tokens in the input (often found in response.usage) |
| $ai_output_choices | List of response choices from the LLM |
| $ai_output_tokens | The number of tokens in the output (often found in response.usage) |
| $ai_total_cost_usd | The total cost in USD (input + output) |
| […] (opens in a new tab) | See full list (opens in a new tab) of properties |
Recommended
Confirm LLM events are being sent to PostHog
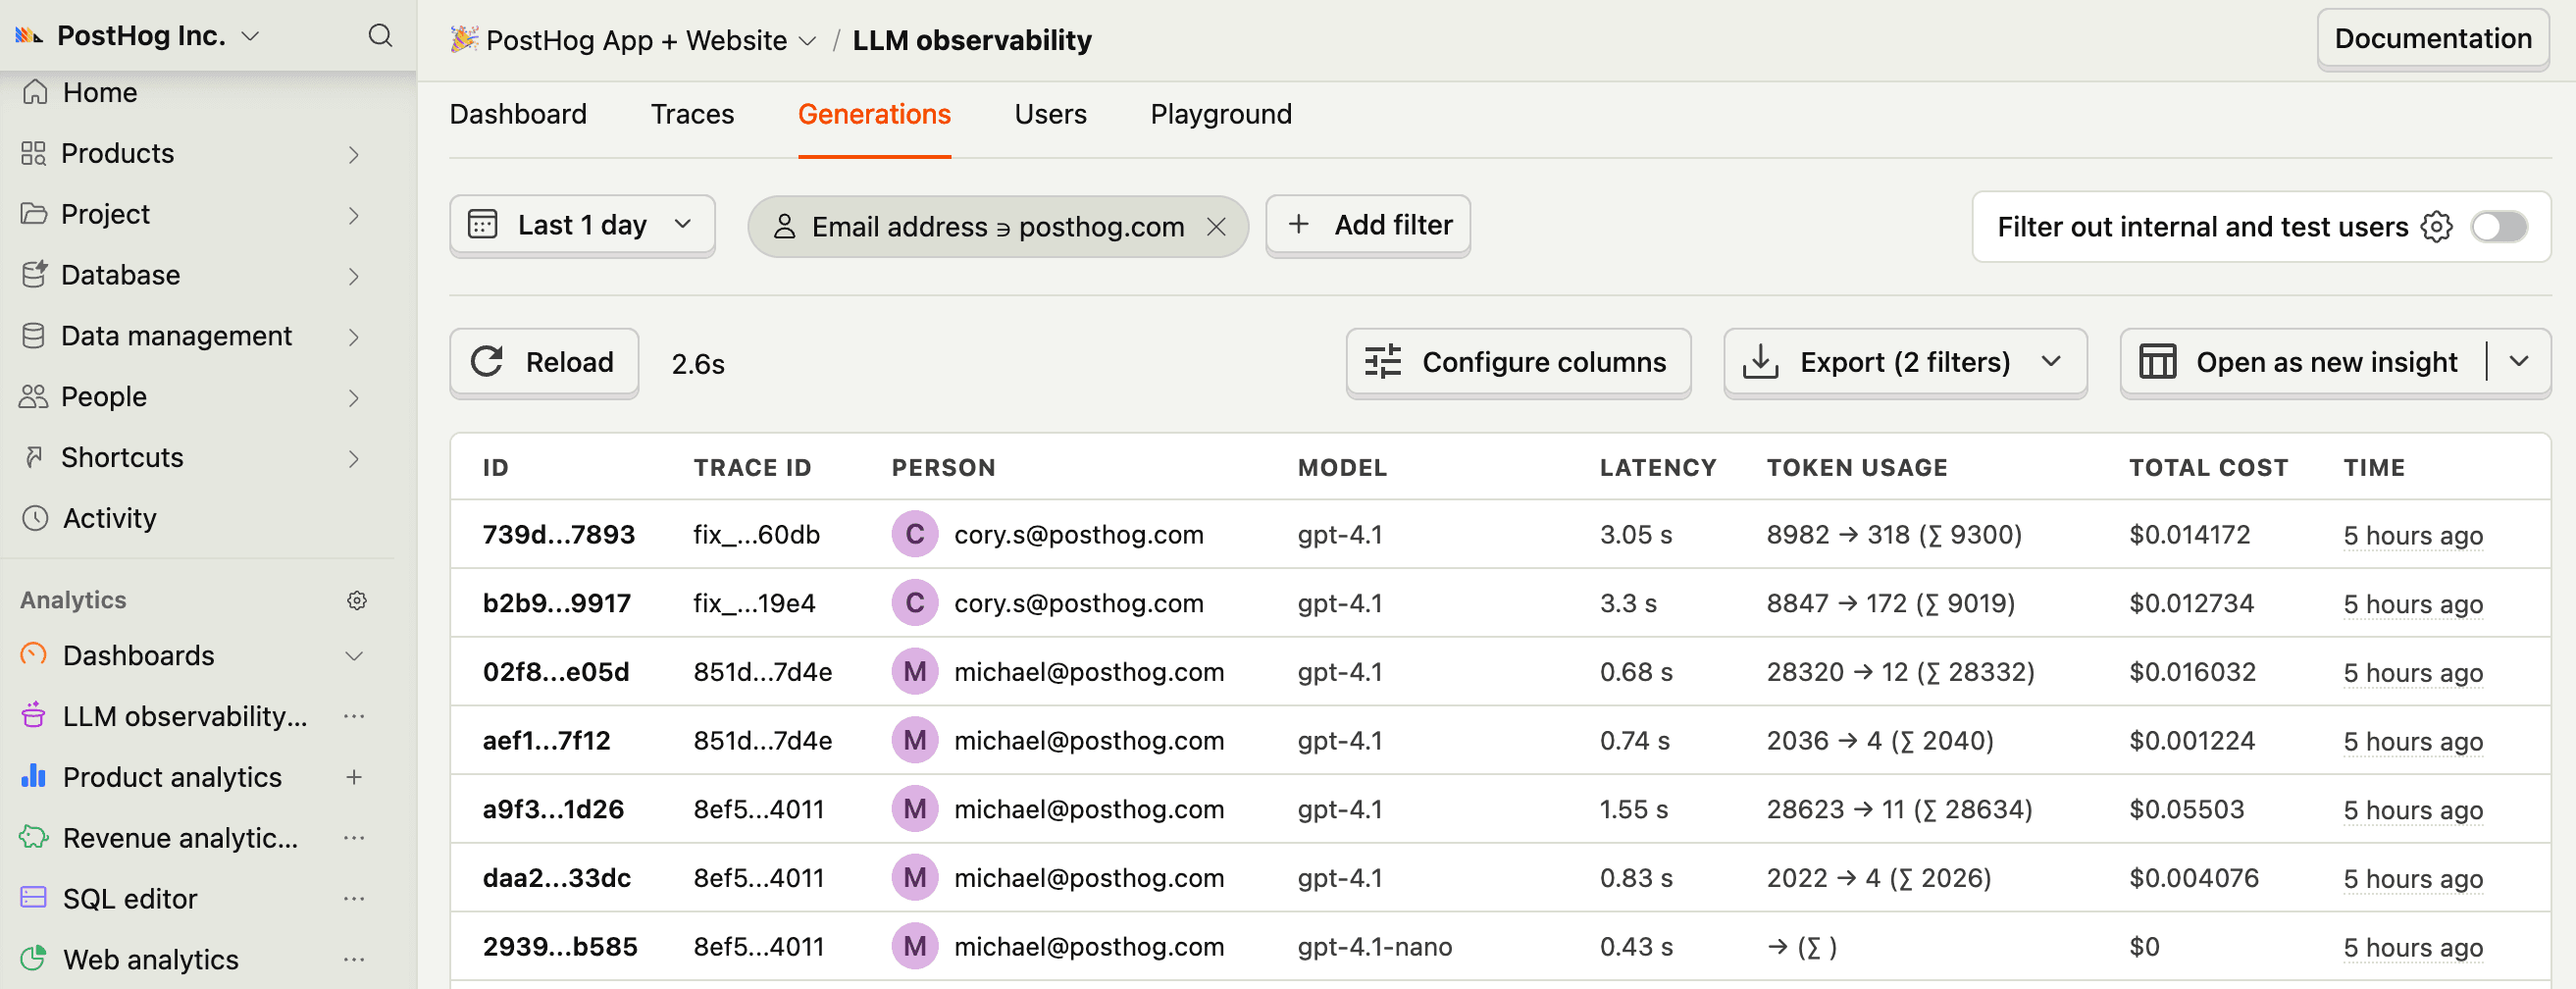
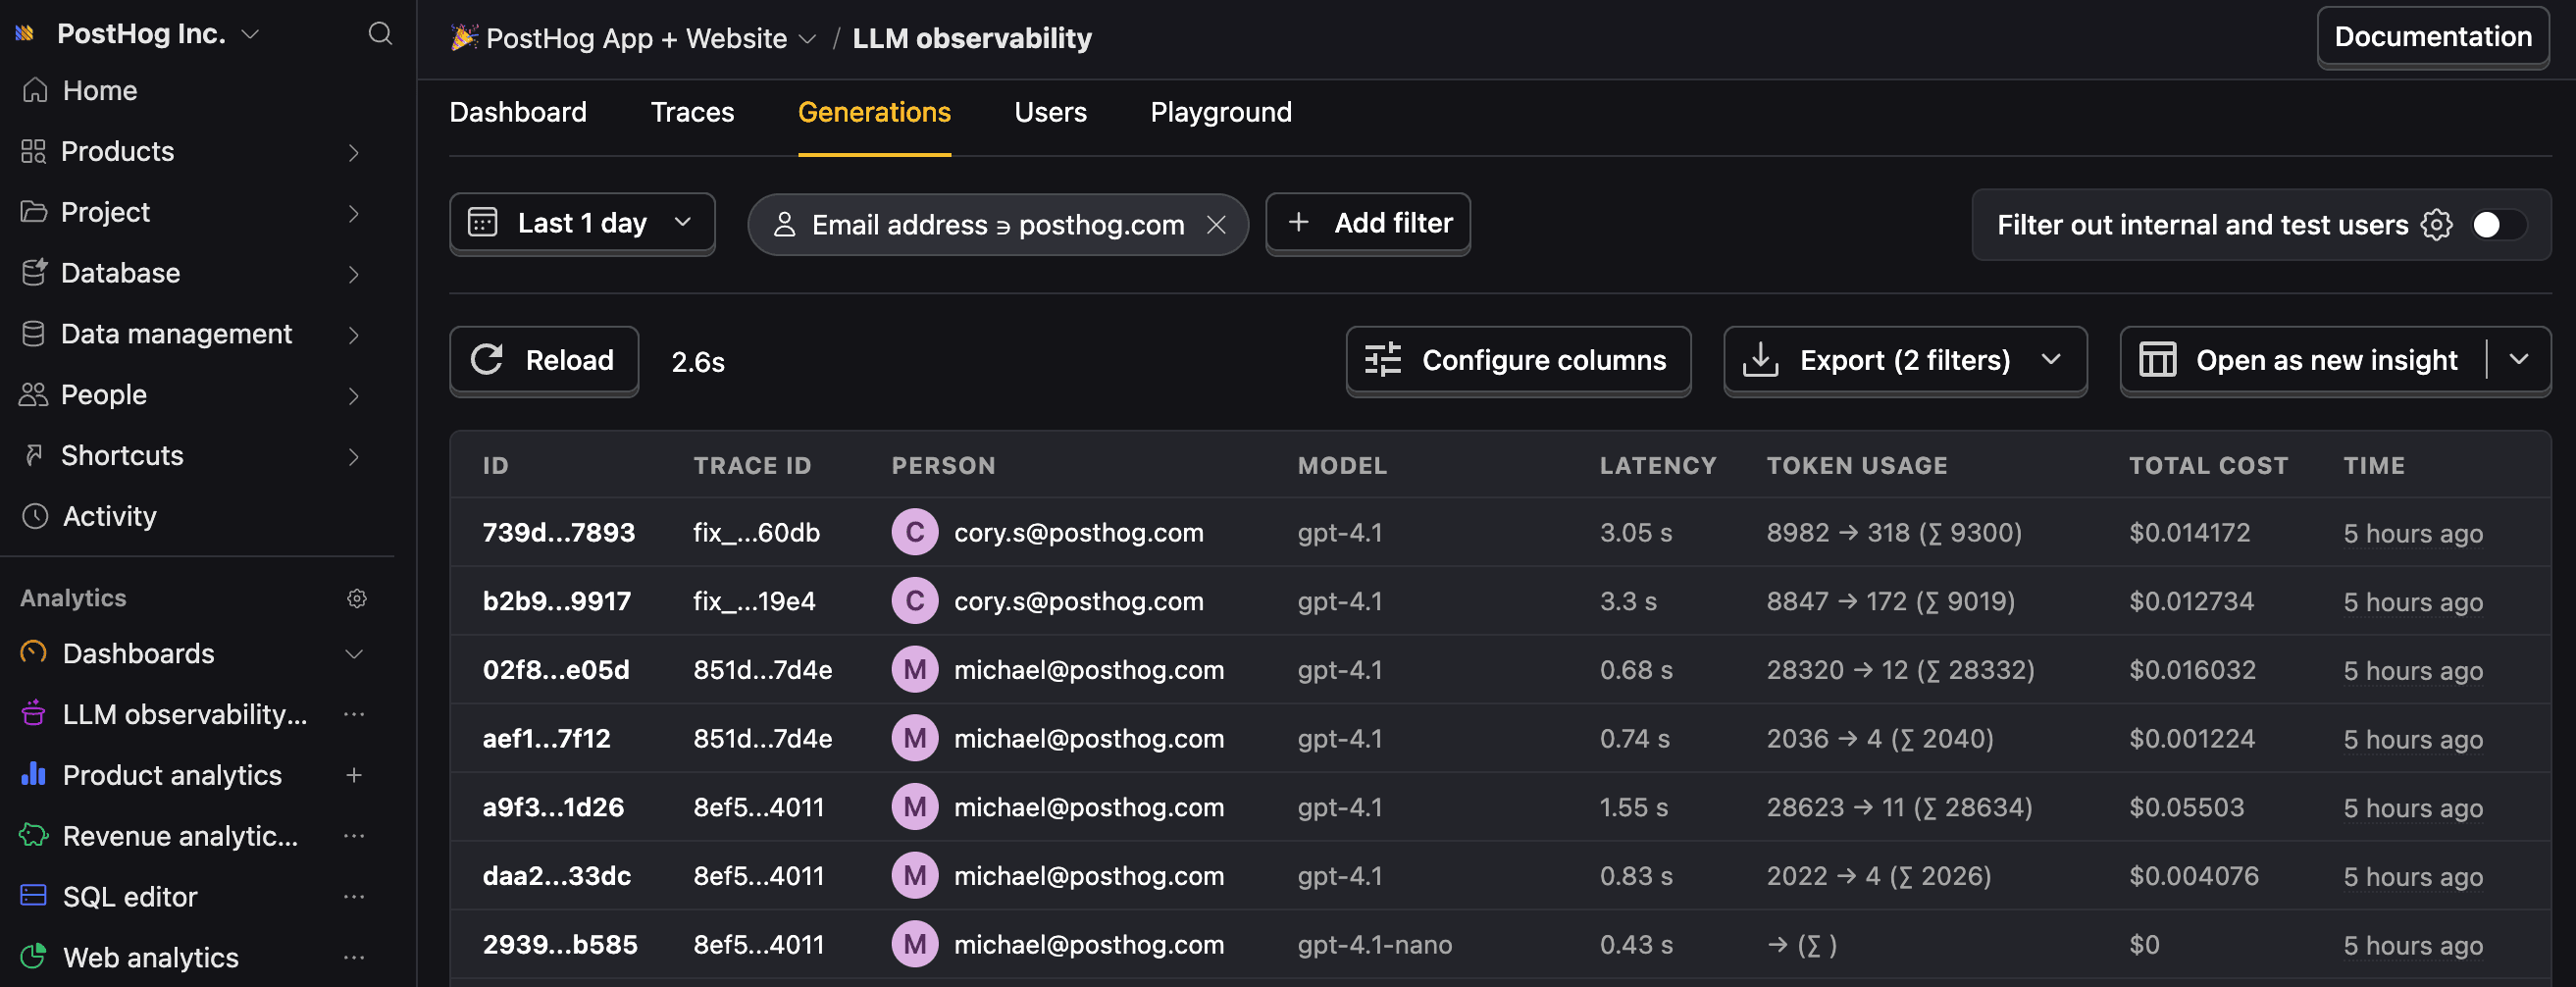
Let’s make sure LLM events are being captured and sent to PostHog. Under LLM analytics, you should see rows of data appear in the Traces and Generations tabs.
5
Recommended
Now that you’re capturing AI conversations, continue with the resources below to learn what else LLM Analytics enables within the PostHog platform.
| Resource | Description |
|---|---|
| Basics (opens in a new tab) | Learn the basics of how LLM calls become events in PostHog. |
| Generations (opens in a new tab) | Read about the $ai_generation event and its properties. |
| Traces (opens in a new tab) | Explore the trace hierarchy and how to use it to debug LLM calls. |
| Spans (opens in a new tab) | Review spans and their role in representing individual operations. |
| Anaylze LLM performance (opens in a new tab) | Learn how to create dashboards to analyze LLM performance. |
Ask a question
HelpfulCould be better